Technical Guide to Deploying User Settings
This guide is designed to aid your deploy user settings to one or more users from the UC Server rather than make configuration changes via the client. It is expected that you are already familiar with the general configuration of the CTI client.
Once the client has been installed and configured to connect to the server, each user should have a user profile, which can be found under Deployment -> User Settings.
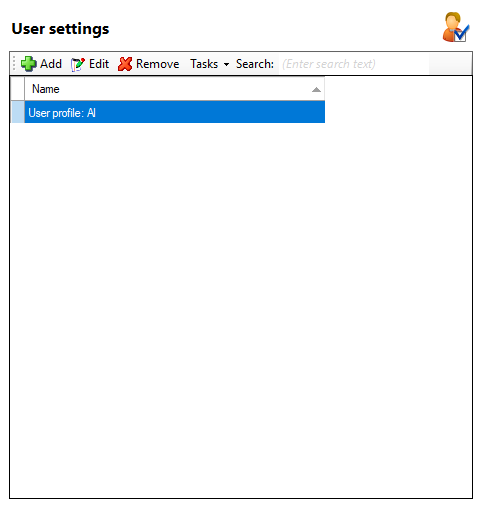
At its simplest you can edit an individual's profile from this screen to change settings such as dialing or events. Changing InternetOn in the screen below from 0 to 1 will turn on Internet dialing for that user.
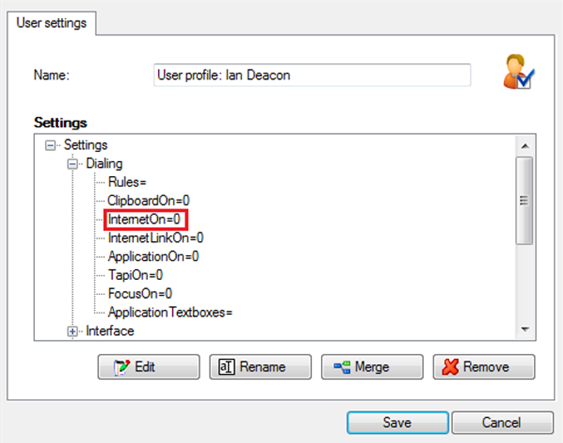
Any changes made and then saved are automatically applied to the user's profile and take immediate effect. As an indication of this, they will see a balloon pop up over their system tray to state that the software is 'Applying User Settings'
At a more complex level it is possible to use an existing profile to create a template of configuration settings and then push these settings out to as many of the users as is required. Before you can do this it is necessary to fully configure one client with all the settings you wish to deploy.
In the example below we are looking to push out the dialing and integration settings for a standard Microsoft Outlook integration. The screenshots below show how the integration would look within the client configuration screens.
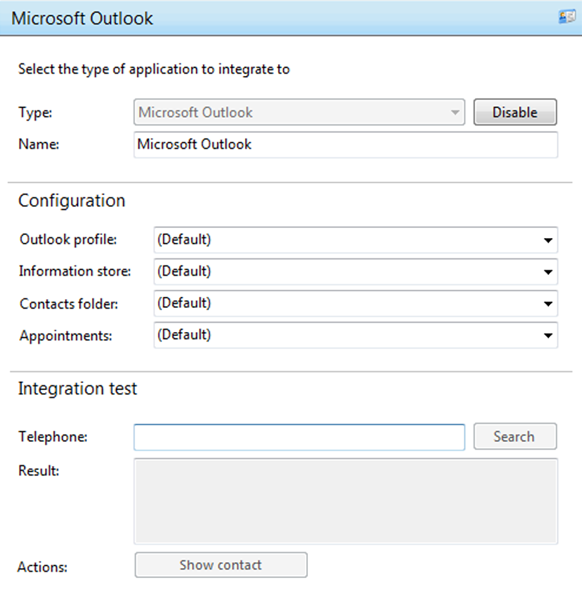
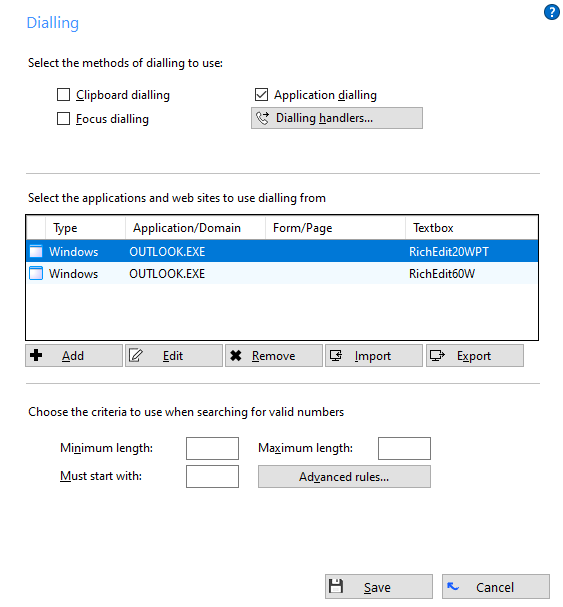
Under the user settings area on the server we are going to take these settings and create a template. This is done by selecting 'Create new settings from user' under the Tasks menu. Then pick the user profile from the list which you are going to use as the basis of the template.
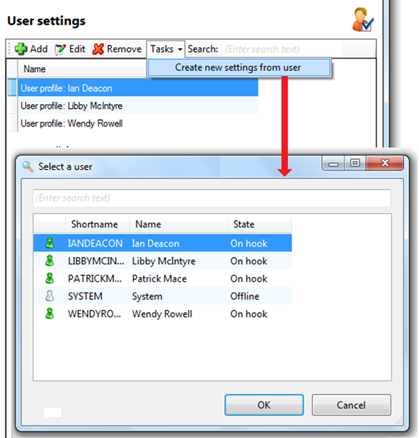
On the next screen change the name from the one created by default to one that you remember in the future.

In this case you would possibly change it to 'Outlook Integration'.
The next step is to remove all the settings which we do not wish to push out to other users. For example Interface, Events and Dialing. What you are left with is something like below.
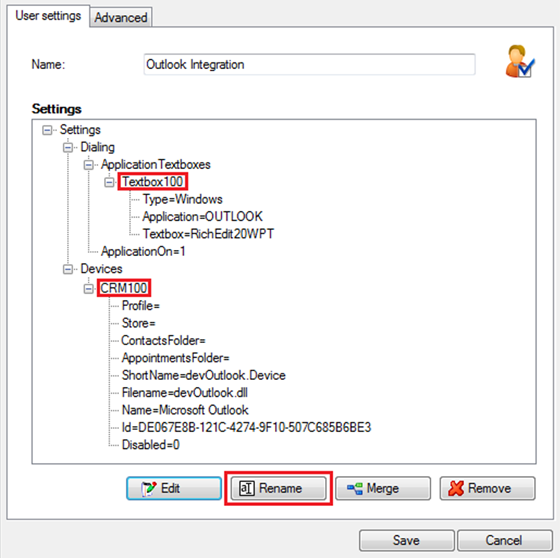
Please note that we have used the Rename function to change the name of the textbox to Textbox100 and CRM to CRM100. The reason behind this is so that we do not inadvertently override any other settings already in place for the other users.
Click Save.
The last step of applying this template to the other users can be done from one of two places.
You can stick on this screen and edit one of the other users. From this screen you then 'Merge' the user's details with the template.

Saving the record will then push these new settings to the user and they should see the 'Applying User Settings' balloon pop up over their client.
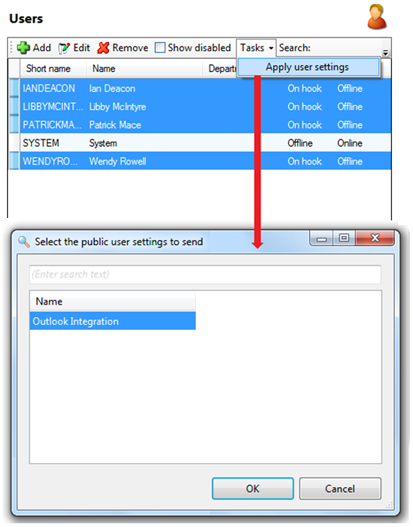
It is also possible to apply this template to more than one user at a time. This is done from the Users screen under Enterprise. Simply select the users you wish to push the settings out to and use the Task menu to select 'Apply user settings'. In the next window you need to then pick the template which you created earlier on. In this case, Outlook Integration. This will push the new settings to all the users you had selected.

 Report this page